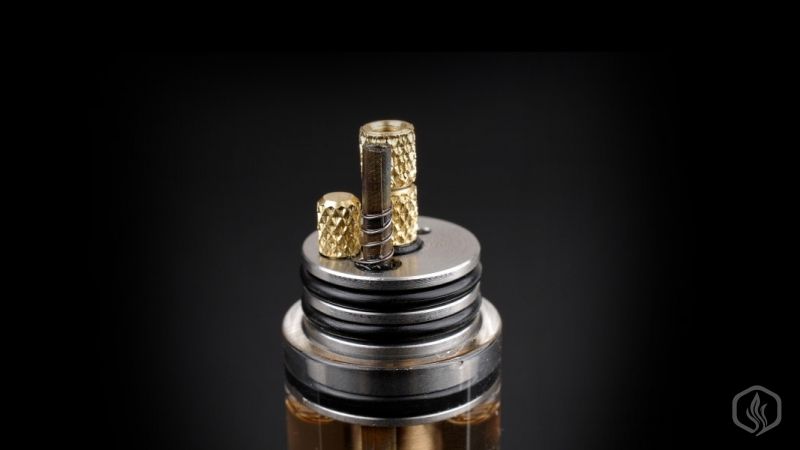
Many vapers have recently observed a new trend in what e-cigarettes are concerned, and that is all about rebuildable atomizers - also known as ‘RBA’ or ‘RDA’. A rebuildable atomizer is made of two pieces built from stainless steel or another form of metal, a ‘deck’ or a ‘base’, and a ‘top cap’.On the bottom of the deck, there is the usual 510 threading, and on top there are usually two posts, a negative post and a positive post. By using these two posts, you attach either a kanthal or a nichrome resistance coil by threading the wire through their holes. The top cap has an air hole drilled on the side, unlike conventional atomizers having the air hole located on the 510 connection. The top cap is mounted by using o-rings so that you can adjust the amount of vapor, and throat hit delivered from your coil.
 Note: Rebuildable atomizers are for advanced users only and should not be used by anyone without any previous technical experience or the necessary knowledge of how to rebuild safely. All rebuildable atomizers should be tested carefully with a multimeter or ohm meter before use. Failure to test properly can result in physical injury.
So what are the benefits? Well, first of all there’s the vapor production and if you have succeeded into building your atomizer without flaws, it will reward you with the thickest and most amazing clouds of vapor you’ve ever seen. Other benefits include a big enhancement in flavor, throat hit and versatility.
Here are the steps necessary to using a RBA:
- Dissembleby removing the cap to your RBA, loosen the two screws holding your wick, coil assembly, and then clean your atomizer.
- Wrap a new coil by grabbing a length of silica and kanthal and wrap around the wick, keeping it close to the fingers holding the wick and wire for stability.
- Mount the new coil to the positive and negative posts on your RBA, while making sure the screws on the posts are sung around the wire but not overly so. When tightening the positive or negative terminals, the coil might get drawn closer to the posts and if you didn’t leave a bit extra, your coil might short out against the terminals, which you should totally avoid.
- Test the new coil after mounting it. Moreover, if you don’t have a multimeter or an ohm-meter don’t even start rebuilding. If your new coil is correctly wrapped and mounted you should get no errors with the device and you continue to checking the resistance. CAUTION: Never use an RBA on an unprotected mod without thorough testing.
- When checking the resistance, if you chose the proper gauge of wire the value should be pretty close to what you desired. If you are using an unregulated device, it is absolutely imperative to get as close as possible to your desired value.
- Fill the tank with e-liquid if all of the above steps concluded without any errors. When filling, you might also want to apply some drops of e-juice to the wick and coil to lessens the time it takes for it to get absorbed.
- Start puffing and enjoy the best vaping experience ever!